

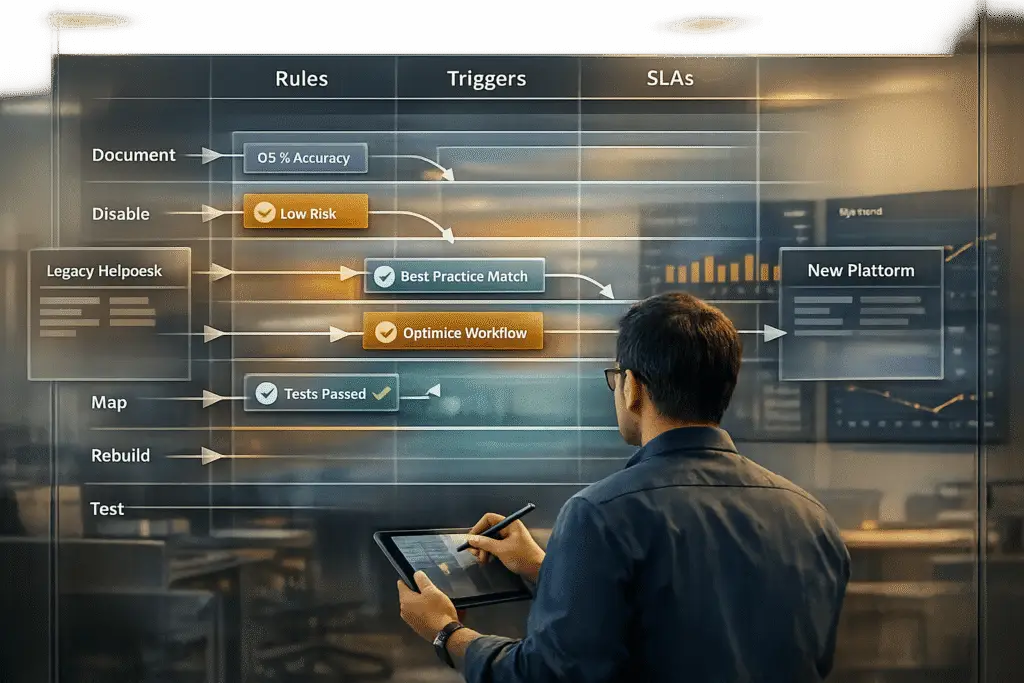
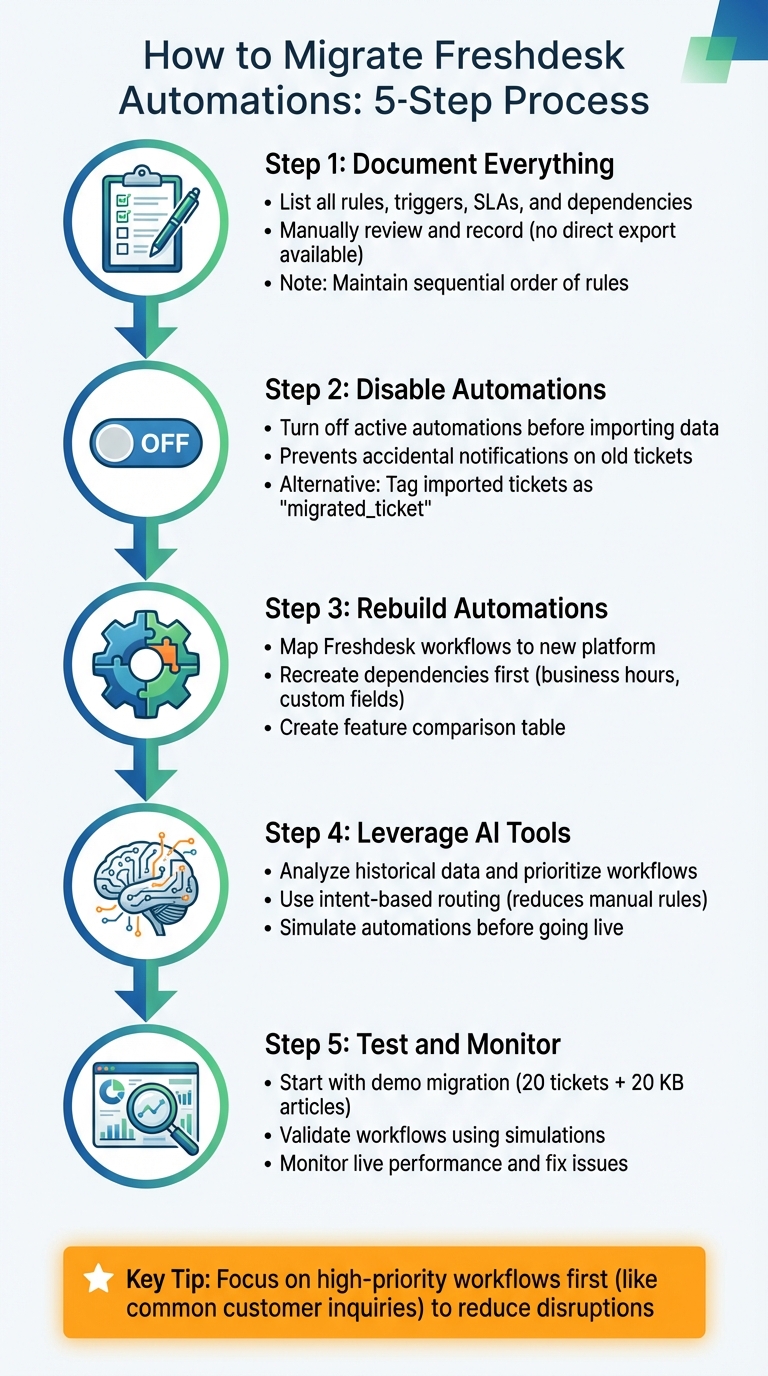
Migrating automations from Freshdesk to a new platform can be complex, but here’s the simplified process:
- Document Everything: List all rules, triggers, SLAs, and dependencies, such as agent groups or custom fields. Freshdesk doesn’t allow direct export of automations, so you’ll need to manually review and record them.
- Disable Automations: Before importing data, turn off active automations to avoid accidental notifications or errors with old tickets.
- Rebuild Automations: Map Freshdesk workflows (e.g., Ticket Creation, Updates, Hourly Triggers) to the new platform. Ensure dependencies like business hours and custom fields are recreated first.
- Leverage AI Tools: Use AI to analyze historical data, prioritize workflows, and simulate automations for smoother transitions. AI can also handle intent-based routing, reducing manual rule creation.
- Test and Monitor: Start with a demo migration, validate workflows using simulations, and monitor live performance to fix any issues post-migration.
Key Tip: Focus on high-priority workflows first, like common customer inquiries, to reduce disruptions and ensure a smoother transition.
5-Step Process for Migrating Freshdesk Automations to a New Platform
Step 1: Document Your Current Automations
Before migrating tickets, take the time to document all your active automations. Skipping this step can disrupt critical workflows. Automations in Freshdesk are divided into categories like Ticket Creation, Ticket Updates, and Hourly Triggers, each functioning differently. Additionally, you’ll need to document SLA policies, business hours, scenario automations, and macros.
Here’s the tricky part: Freshdesk doesn’t provide a direct way to export automation rules as a list. Instead, you’ll need to request a full account export to gather all your data in one place. After that, manually review each rule in the Admin panel. Since these rules execute sequentially from top to bottom, maintaining their order is crucial when rebuilding them on a new platform. This documentation will serve as the backbone for accurate migration in later steps.
Export Rules, Triggers, and SLAs
Start by navigating to Admin > Workflows > Automation Rules in your Freshdesk account. You’ll find three tabs corresponding to the types of rules. Carefully document details for each rule, including its Name, Description, Events (specific to Ticket Updates), Conditions, and Actions. Examples include email triggers and inactivity-based actions.
Don’t forget to export SLA policies as well. These are separate from automation rules but are just as important. Include configurations such as response and resolution times, business hours, and escalation paths. If you’re on a higher-tier plan like Estate or Forest, check for Parent-Child Ticketing under Admin > Advanced ticketing. This feature uses specific relation fields, which can cause migration errors if not properly documented.
Map Dependencies and Related Elements
Automation rules are rarely standalone; they rely on other elements to function. For example, a rule that assigns "Payment Failed" tickets to the Billing team won’t work if that team isn’t set up in your new platform. The same applies to custom fields, agent groups, products, and business hours. These dependencies are often hidden within the Conditions and Actions of each rule, so a thorough audit is essential.
Also, review external integrations like webhook URLs, authentication headers, and JSON payloads. If any rules are tied to specific business hours, ensure those hours are recreated on the new platform to avoid silent failures. Once you’ve mapped all dependencies, you can move on to disabling active automations.
Disable Active Automations
After documenting everything, disable all automations before importing data. Leaving them active could trigger unintended notifications, such as sending messages about tickets resolved months ago. This happens because imported tickets can activate Ticket Creation and Ticket Update rules as if they’re new. Disabling automations ensures your workflows remain intact during migration.
To disable, go to Admin > Workflows > Automations and turn off rules under Ticket Creation, Time Triggers, and Scenario Automations. If you’re using Parent-Child Ticketing, disable it under Admin > Helpdesk productivity > Advanced ticketing to avoid errors with task-related tickets. If disabling automations isn’t feasible due to business needs, use a workaround: tag all imported tickets with something like "migrated_ticket", then adjust your active rules to exclude tickets with that tag. This approach keeps your live support running smoothly while safeguarding historical data.
sbb-itb-e60d259
Step 2: Match Automations to Your New Platform
Once you’ve documented your automations, the next step is to map each one to its equivalent on the new platform. For example, Freshdesk organizes automations into categories like Ticket Creation, Ticket Updates, and Hourly Triggers. To rebuild these, start by setting up agents, groups, business hours, and custom fields. This process ensures that the transition to your new platform is smooth and functional.
Some configuration items – like automations, SLAs, business hours, and roles – can’t simply be imported along with tickets and contacts. Instead, you’ll need to recreate them from scratch. Use your documentation to reestablish baseline settings before adding automation rules and SLAs. If these foundational elements aren’t in place, your rules might fail silently due to missing references. By leaning on your initial documentation, you can rebuild a solid automation framework that works seamlessly on the upgraded platform.
Create a Feature Comparison Table
To streamline the mapping process, create a feature comparison table. This table should list every Freshdesk automation object alongside its counterpart on the new platform. Include details like Name, Conditions, Actions, and Execution Order. Remember, Freshdesk processes rules sequentially, either as "first matching" or "all matching". Also, document any features tied to specific service plans, such as round-robin or skills-based routing, which may be restricted to certain tiers.
Address Feature Gaps with AI Tools
AI tools can be a game-changer when direct mappings aren’t available. They interpret customer intent, adding a layer of context that rigid "if-this-then-that" rules can’t handle. For instance, instead of creating separate rules for phrases like "I want my money back" or "cancel my payment", an AI-powered platform can group these under a single intent and route them to the billing team.
AI tools can also connect your support platform to external resources like Confluence, Google Docs, or Slack, filling in knowledge gaps. Before going live, use a simulation mode to test your new automation logic against historical Freshdesk tickets. This step helps you validate workflows, catch missing dependencies, and fix broken logic – all without affecting customers.
Identify High-Priority Workflows
Start by focusing on high-volume, low-complexity automations. Use a priority matrix that considers ticket volume, business impact, and complexity. For example, if "Where is my order?" queries make up a large percentage of your tickets, prioritize rebuilding those routing and response rules first. Tackling these simpler workflows early minimizes disruptions and gives you a chance to test your migration process on a smaller scale.
Once the basics are running smoothly, you can address more complex, multi-condition scenarios. Keep in mind that 80% of data migration projects exceed their budgets and timelines. By focusing on high-priority workflows first, you increase your chances of staying on track and meeting your goals.
Step 3: Build and Improve Your Automations
Recreate your workflows on the new platform to streamline operations and increase efficiency.
Configure Core Workflows
Begin by setting up your essential automations using the workflow builder on your new platform. In Freshdesk, automations are grouped into three categories: Ticket Creation (triggered when new tickets are created), Ticket Updates (activated by specific events like changes in ticket status), and Hourly Triggers (rules that run every hour to scan tickets). While your new platform might use different terminology or layouts, the underlying logic is often similar.
To make the transition smoother, map Freshdesk’s "Events, Conditions, and Actions" framework to the logic of your new system. For instance, if you had a rule in Freshdesk that routed tickets mentioning "refund" or "payment" to the billing team, replicate this rule using the new platform’s tools. Remember to create any necessary custom fields in the new system beforehand – without them, your automations won’t work as intended.
Once your basic workflows are in place, you can take things up a notch by incorporating AI-driven automation.
Add AI-Powered Automation
Modern platforms often go beyond simple keyword-based triggers, offering AI capabilities that can interpret customer intent more effectively. Instead of setting up multiple rules for phrases like "I want my money back", "cancel my payment", or "process my refund", AI can recognize intent variations and route tickets accordingly.
"An AI agent can read a customer’s entire message and understand the actual problem. It can tell the difference between ‘I need a refund because my order is late’ and ‘I want to read your refund policy,’ and handle each one correctly."
- Kenneth Pangan, Writer, eesel AI
AI tools can also link your support system to external resources like Google Docs, Slack, or Confluence, pulling answers from documentation outside the help desk. Before activating these AI features, use a simulation mode to test how they perform with historical tickets. This step helps identify potential issues without affecting live customer interactions.
Start by automating high-traffic inquiries, such as "Where is my order?" As you gain confidence in the system, gradually expand its scope. Always include a human hand-off option in AI workflows to ensure accuracy and maintain customer trust.
Recreate Scenario-Based Actions
Once you’ve added AI functionalities, turn your attention to multi-step processes by rebuilding scenario-based actions. In Freshdesk, Scenario Automations manage bulk actions and complex workflows, but these usually don’t transfer automatically. You’ll need to manually recreate them as macros or multi-step workflows in the new platform. Begin by documenting each scenario’s conditions, steps, and sequence, then rebuild them in the new system.
For example, if you had a workflow that escalated unresolved tickets after 48 hours and notified a manager, replicate this process using the new platform’s tools. Be sure to account for dependencies like custom fields, tags, and ticket statuses. These elements must exist in the new system for the automation to function properly.
Keep in mind that most data migration projects tend to go over budget or take longer than expected. By focusing on foundational workflows first and layering in complexity gradually, you can mitigate delays and control costs. Test each workflow in small, controlled batches before rolling it out to your entire team. This step-by-step approach ensures a smoother transition and minimizes disruptions.
Step 4: Test and Monitor Your Migrated Workflows
After rebuilding your automations, thorough testing and monitoring are essential to ensure everything works as intended. This step helps verify that your workflows are functioning properly before exposing them to live customer interactions.
Test in Controlled Batches
Start with a small-scale demo migration. Use 20 random tickets and 20 knowledge base articles to confirm that field mapping and rule triggering work as expected. Before importing data, disable all automation rules and email notifications in your target account to avoid accidental updates during the process.
Carefully audit the results to check that each ticket retains critical details like type, status, priority, source, custom fields, requester, agent, and tags. Use "View records" reports to cross-check source IDs with new IDs, ensuring data integrity. If your plan includes parent-child ticketing, temporarily disable this feature to avoid migration errors.
Once you’ve confirmed the demo migration results, move forward with the full migration. Follow this with a delta migration to account for any records that were added or updated during the migration window. If automations are active, tag imported tickets to prevent them from triggering rules unnecessarily.
With a successful demo migration under your belt, you’re ready to move on to AI-based validation.
Use AI for Validation
Leverage simulation mode to test your migrated workflows against thousands of historical tickets. This helps verify that resolution rate predictions align with expected outcomes. Focus on a sample of complex tickets to ensure the AI-generated results match what you’d anticipate.
AI tools can also analyze your documentation to pinpoint gaps or unanswered questions that could disrupt workflows. Beyond validation, these tools can provide analytics to forecast resolution rates and potential time savings, giving you a clearer picture of how your workflows will perform post-migration. Before increasing API limits to accelerate the transfer (up to 2,000 tickets per hour), consult with support to confirm your system can handle the load.
Once AI validations confirm that everything is functioning as it should, shift your attention to live monitoring.
Track Performance After Launch
Immediately after re-enabling automations, keep a close eye on key metrics. In the Admin > Workflows section, review the past 7 days of rule statistics to confirm that your rules are firing correctly on live tickets.
Pay attention to any sudden spikes, such as a 45% increase in SLA violations within a specific group – this could signal a misconfigured migration rule. Monitor resolution rates to ensure automated closures are happening as planned, and check CSAT survey responses triggered by migrated rules to identify any negative effects on customer satisfaction.
Make sure agents are correctly populating mandatory custom fields, like "Inquiry Type", since missing values can cause rules to fail. Finally, review migration reports for any "failed" or "skipped" records to uncover data gaps that might disrupt rule execution. It’s worth noting that around 80% of data migration projects face budget overruns or delays, highlighting the importance of vigilant monitoring throughout the process.
Conclusion
Migrating automations isn’t just about transferring processes – it’s about transforming them. The process involves four key steps: documenting, mapping, rebuilding with AI, and testing. Together, these steps turn what could be a chaotic migration into a well-organized upgrade.
The goal isn’t to replicate old systems but to rebuild with greater intelligence. As Eric Klimuk, Founder and CTO of Supportbench, explains:
"Data migration is more than just copying files from one system to another – it’s a critical process that can affect everything from day-to-day operations to long-term compliance".
This is the perfect opportunity to ditch outdated workarounds, simplify overly complex workflows, and embrace AI-native tools that can interpret customer intent rather than just responding to keywords.
Supportbench makes this process easier by offering features like sandbox testing, real-time dashboards, and simulation modes for validating historical data. Instead of sticking with basic "if-this-then-that" rules, you can adopt intelligent ticket routing and automation that taps into unified knowledge sources. Tools like Confluence, Slack, and Google Docs can be seamlessly integrated, reducing the need for constant IT involvement. This approach encourages you to rethink traditional methods.
Migration isn’t just about overcoming technical hurdles – it’s about replacing outdated limitations with smarter, AI-powered solutions. Companies that take a strategic approach often see major benefits. For example, during their July 2025 migration, Rossi Residencial reduced infrastructure costs by 50% while improving service quality. The key is choosing a platform built for ongoing improvement, rather than one that treats AI as an optional feature.
To navigate budget and timeline constraints, preparation is essential. Start with high-volume, low-complexity workflows, validate changes in controlled batches, and establish clear fallback plans. The ultimate goal is to create automations that enhance agent productivity and deliver a better customer experience – without falling into the trap of frustrating, repetitive "robot loops."
FAQs
What are the steps to document Freshdesk automations before migrating to a new platform?
Start by cataloging all existing automations in Freshdesk. This includes rules, triggers, and SLAs. Break them down by type – such as ticket creation rules, assignment workflows, or notification triggers – and carefully record their conditions, actions, and dependencies. This step ensures nothing is overlooked.
Then, map out how these automations interact with the rest of your system. Consider workflows, SLAs, and custom fields. Don’t forget to document any custom scripts or third-party integrations that are in use. These details are crucial to avoid missing key components during migration.
Thorough documentation makes it easier for your team to replicate or adapt automation logic on the new platform, leading to a smoother transition.
How can AI tools help migrate automations like rules, triggers, and SLAs from Freshdesk to a new platform?
AI tools make automation migration a lot easier by handling rules, triggers, and workflows through APIs. This cuts down on manual work by automating tasks like mapping existing configurations, checking data integrity, and fine-tuning workflows for the new platform.
On top of that, AI can spot inefficiencies in your current setup and recommend changes, turning the migration process into a chance to improve your customer support operations. By using AI, you can save time, reduce mistakes, and concentrate on providing top-notch support experiences.
What should you check after migrating Freshdesk automations to a new platform?
After moving Freshdesk automations, double-check that everything is working properly. Start by focusing on data accuracy – make sure all rules, triggers, and SLAs were transferred without errors. Run tests on workflows to confirm they function as intended and match your team’s processes. Also, keep an eye on ticket relationships, like linked conversations or escalations, to prevent any hiccups in customer support.
Keep reviewing performance metrics and gather input from your team regularly. Addressing any issues early on will help keep the transition smooth and ensure your service quality stays intact.
Related Blog Posts
- How do you run a successful help desk migration project (timeline, roles, and cutover plan)?
- How do you migrate from a US helpdesk to a non-US platform without losing history or data?
- How do you migrate away from Freshdesk without losing tickets, contacts, or history?
- How do you map Freshdesk fields, groups, and statuses to a new helpdesk?