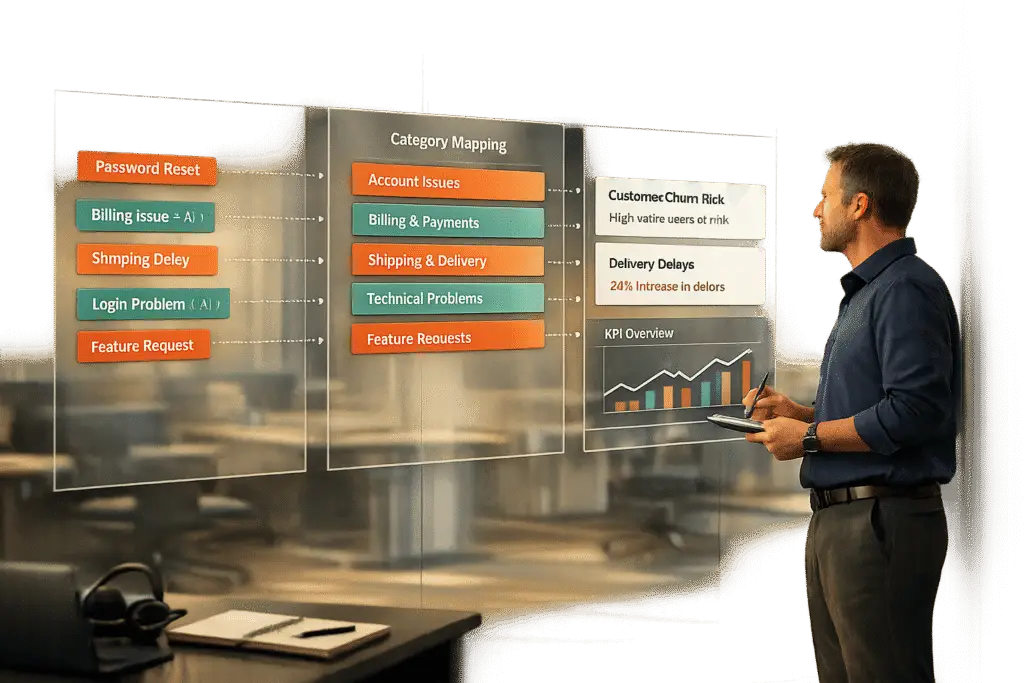
Want actionable insights from your support tickets? A smart tagging strategy is the key to transforming raw data into decisions that matter. By categorizing tickets effectively, managing your ticket queues becomes significantly more efficient, you can identify trends, track key metrics, and even leverage AI to save time and improve accuracy.
Key Takeaways:
- Start with business goals: Tags should align with measurable outcomes like resolution times or feature-related inquiries.
- Simplify your taxonomy: Use a two-tier structure (e.g., broad topics and detailed subtopics) to keep things clear.
- Standardize terms: Avoid confusion by using one consistent label per concept and creating a tag glossary.
- Leverage AI: Automate tagging with NLP to improve efficiency and consistency.
- Regular reviews: Audit and refine your tags every 6 months to ensure they stay relevant and manageable.
By focusing on what matters most – like common issues and business priorities – you can build a tagging system that drives better decisions and saves time. Let’s dive into the details.
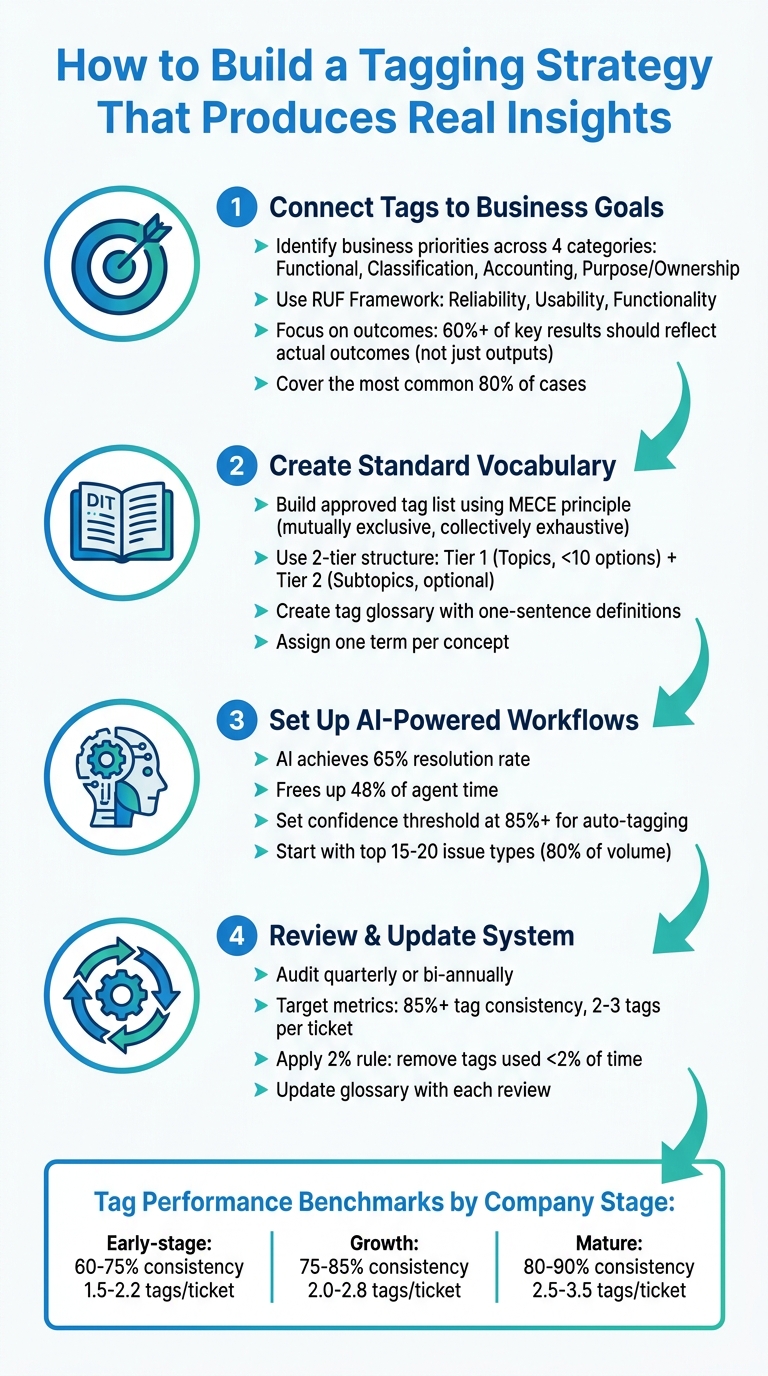
4-Step Process to Build an Effective Support Ticket Tagging Strategy
Setting up Tags in Gorgias
sbb-itb-e60d259
Step 1: Connect Tags to Business Goals and Metrics
To turn raw data into meaningful insights, you’ve got to start by linking tags directly to your business goals. The key is to focus on measurable outcomes. Before you create even one tag, ask yourself: What are you trying to track? Are you looking at resolution times by issue type? Escalation rates? Or maybe you want to identify which product features are driving the most support tickets?
Identify Your Key Business Priorities
Tags should reflect your existing business priorities. Talk to stakeholders who are already accountable for specific outcomes – like finance teams managing cost allocation, security teams overseeing compliance, IT operations monitoring SLA performance, or product teams analyzing feature requests [4]. Organize your tagging needs into four main categories:
- Functional tags (e.g., application tier or environment) help with operations and automation.
- Classification tags (e.g., confidentiality level or SLA tier) aid governance and security.
- Accounting tags (e.g., cost center or department) support financial tracking.
- Purpose/Ownership tags (e.g., business process or ops team) ensure alignment and accountability [4][5].
This structure ensures tags are tied to real outcomes instead of just adding unnecessary layers of complexity.
Here’s the big takeaway: focus on outcomes, not just outputs. Research shows that 70% of reported key results are outputs (like deliverables), not true outcomes (like changes in customer behavior) [6]. High-performing teams aim for at least 60% of their key results to reflect actual outcomes [6]. If a tag doesn’t impact ticket routing and prioritization or provide meaningful data, it’s time to get rid of it [2].
Start with a simple taxonomy that covers the most common 80% of cases your team encounters [2]. For support teams, the RUF Framework is a great starting point. Break tickets into three categories: Reliability (errors and performance issues), Usability (navigation and workflow questions), and Functionality (new feature requests) [2]. This approach links tags directly to product health, user experience, and future planning.
Interview Your Support Teams
Your agents are the ones using these tags daily, so their input is essential. If your tagging system is too complicated, they’ll either skip it or use categories randomly – ruining your data [2][1]. Ask them questions like: What information would help you find similar tickets faster? What issues do you wish leadership understood better? Are there any categories that feel unclear or redundant?
These discussions can help you avoid "synonym chaos", where one agent tags a ticket as "Billing" and another uses "Payments" for the same issue [2]. Standardize your terms by picking one consistent label for each concept and sticking with it. Agents can also flag when catch-all tags like "Other" or "General Inquiry" become overused, signaling a need to refine your categories [2].
To keep things consistent, create a tag glossary with one-sentence definitions for every category and subcategory. Include this in your agent onboarding process to prevent confusion, like one person tagging a bug as a "technical issue" while another calls it "usability" [2]. This glossary ensures your data stays consistent and forms a solid foundation for leveraging AI-driven tagging later on.
Build a Tag Hierarchy
A simple structure works best. Use a two-tier model:
- Tier 1: Mandatory "Topics" (e.g., Billing or Technical Issue). Keep these mutually exclusive and limited to fewer than 10 options to avoid overwhelming agents.
- Tier 2: Optional "Subtopics" (e.g., Refund Request or Login). These add depth for analysis without overloading your team [2].
Avoid using broad, catch-all categories. If agents can’t find the right category, it’s a sign your Tier 1 options need adjustment – not an excuse to create an "Other" bucket [2]. The goal is to make the system straightforward for agents while still providing enough detail for leadership to analyze trends effectively [2].
Make this an ongoing process. Set a schedule – like quarterly or bi-annual reviews – to evaluate tag usage with your team. Consolidate similar tags, remove ones that aren’t being used, and update your categories as your product and customer needs evolve [2][1]. A good tagging strategy isn’t static; it’s a dynamic system that grows with your business.
Once you’ve nailed down your hierarchy, the next step is to standardize your tag vocabulary.
Step 2: Create a Standard Tag Vocabulary
Once you’ve outlined your business-driven tag hierarchy, the next step is to establish a standardized vocabulary. The goal is simple: assign one term per concept. This ensures terms like "Billing", "Payments", and "Invoicing" don’t overlap or fragment your data. Start by crafting a precise list that reflects your priorities.
Build an Approved Tag List
Create a list of approved tags that covers the majority – about 80% – of your tickets. To ensure clarity, apply the MECE principle (mutually exclusive, collectively exhaustive). This prevents overlap between tags and ensures every ticket fits neatly into one primary category.
Focus on tags that address your team’s core needs. For example, if you’re analyzing process issues versus cost tracking, your tag structure will vary. Process improvement might use tags like "Login Errors" or "Performance Issues" to identify breakdowns. On the other hand, cost tracking might rely on tags like "Onboarding Support" or "Technical Troubleshooting" to understand how resources are allocated.
To keep the system organized, assign specific ownership for each tag. Designate stewards who oversee data governance and act as a point of contact for any questions about the vocabulary. This avoids chaos and ensures agents don’t create duplicate or inconsistent tags on the fly. This level of organization is essential for creating a seamless customer support management system.
Set Naming Conventions
Choose tag names that are simple, concise, and stable. Your Tier 1 categories should be broad enough to remain relevant over time. For instance, "Technical Issue" is a better choice than "Login Bug in Version 3.2" because it remains applicable even after new updates are rolled out.
Define each tag with a clear, one-sentence explanation and incorporate these definitions into your agent onboarding process. For example, if you use a tag called "Reliability", provide a definition like: "Errors, slow performance, or service unavailability." Without this clarity, agents might interpret the same issue differently – one tagging a slow-loading page as "Reliability", another as "Usability."
"Ticket tagging fails when teams treat it as a tool problem. The tool that applies your tags only matters if the tagging structure and taxonomy itself are solid."
– Jake Bartlett, Writer and Customer Support Expert [2]
Use AI to Automate Tagging
With a standardized vocabulary in place, AI can take over much of the tagging process, ensuring consistency and efficiency. By leveraging clear definitions, AI can automatically apply tags based on context rather than relying solely on keywords. For example, it could be trained to recognize that "Reliability" includes errors, downtime, and performance issues.
To maintain quality, set confidence thresholds. Tags with a confidence level below, say, 85%, can be flagged for manual review before being finalized [7][8]. This "human-in-the-loop" approach ensures edge cases are handled properly and reduces errors on ambiguous tickets.
AI also ensures comprehensive coverage across all channels, something manual tagging often struggles to achieve [1]. Once your taxonomy is solid, AI can even retroactively tag older tickets, uncovering insights from historical data that might have been missed. However, remember this: AI is only as effective as your tagging structure. If your taxonomy is inconsistent, automation will amplify the problem rather than solve it.
A consistent vocabulary lays the groundwork for the AI-driven tagging workflows described in the next step.
Step 3: Set Up AI-Powered Tagging Workflows
Once you’ve established a standardized vocabulary, it’s time to leverage AI. Manual tagging can be a tedious process, and when the volume of tickets increases, agents often tag inconsistently or miss tags altogether. AI-powered workflows tackle this challenge by using Natural Language Processing (NLP) to grasp intent and context, rather than relying solely on literal keywords [9][3]. For instance, the system can differentiate between a customer asking to "cancel a cancellation" and a straightforward "cancel" request – something traditional keyword-based systems often misinterpret [3]. This approach lays the groundwork for consistent tagging across all communication channels.
Use a Centralized Tagging System
A centralized tagging system serves as the single source of truth for managing tags. Whether tickets come from email, chat, or phone, a centralized system ensures all tags follow the same taxonomy and logic. This eliminates issues like duplicate tags or inconsistent terminology across different channels. Centralization also simplifies audits by enabling you to review tag usage, merge duplicates, and remove unnecessary tags – all from one dashboard [9][2]. For B2B teams handling complex accounts with multiple touchpoints, maintaining this consistency is critical.
Apply AI for Auto-Tagging and Predictions
Once your data is centralized, AI can take over to further optimize the process. It can auto-populate fields such as priority, ticket type, and custom attributes like product area or sentiment, all by analyzing the full conversation history [3]. AI also excels in multilingual support, accurately classifying tickets in languages like French, German, or Japanese – areas where keyword-based systems often fall short [3]. Additionally, AI can predict key outcomes such as CSAT, CES, and NPS and First Contact Resolution (FCR), flagging urgent cases early. On average, AI support agents achieve a resolution rate of 65% and free up about 48% of agent time [3]. Start by training your AI on the top 15–20 issue types that make up 80% of your ticket volume [9], and then gradually expand to niche categories as the system becomes more refined.
How Supportbench Handles Tagging
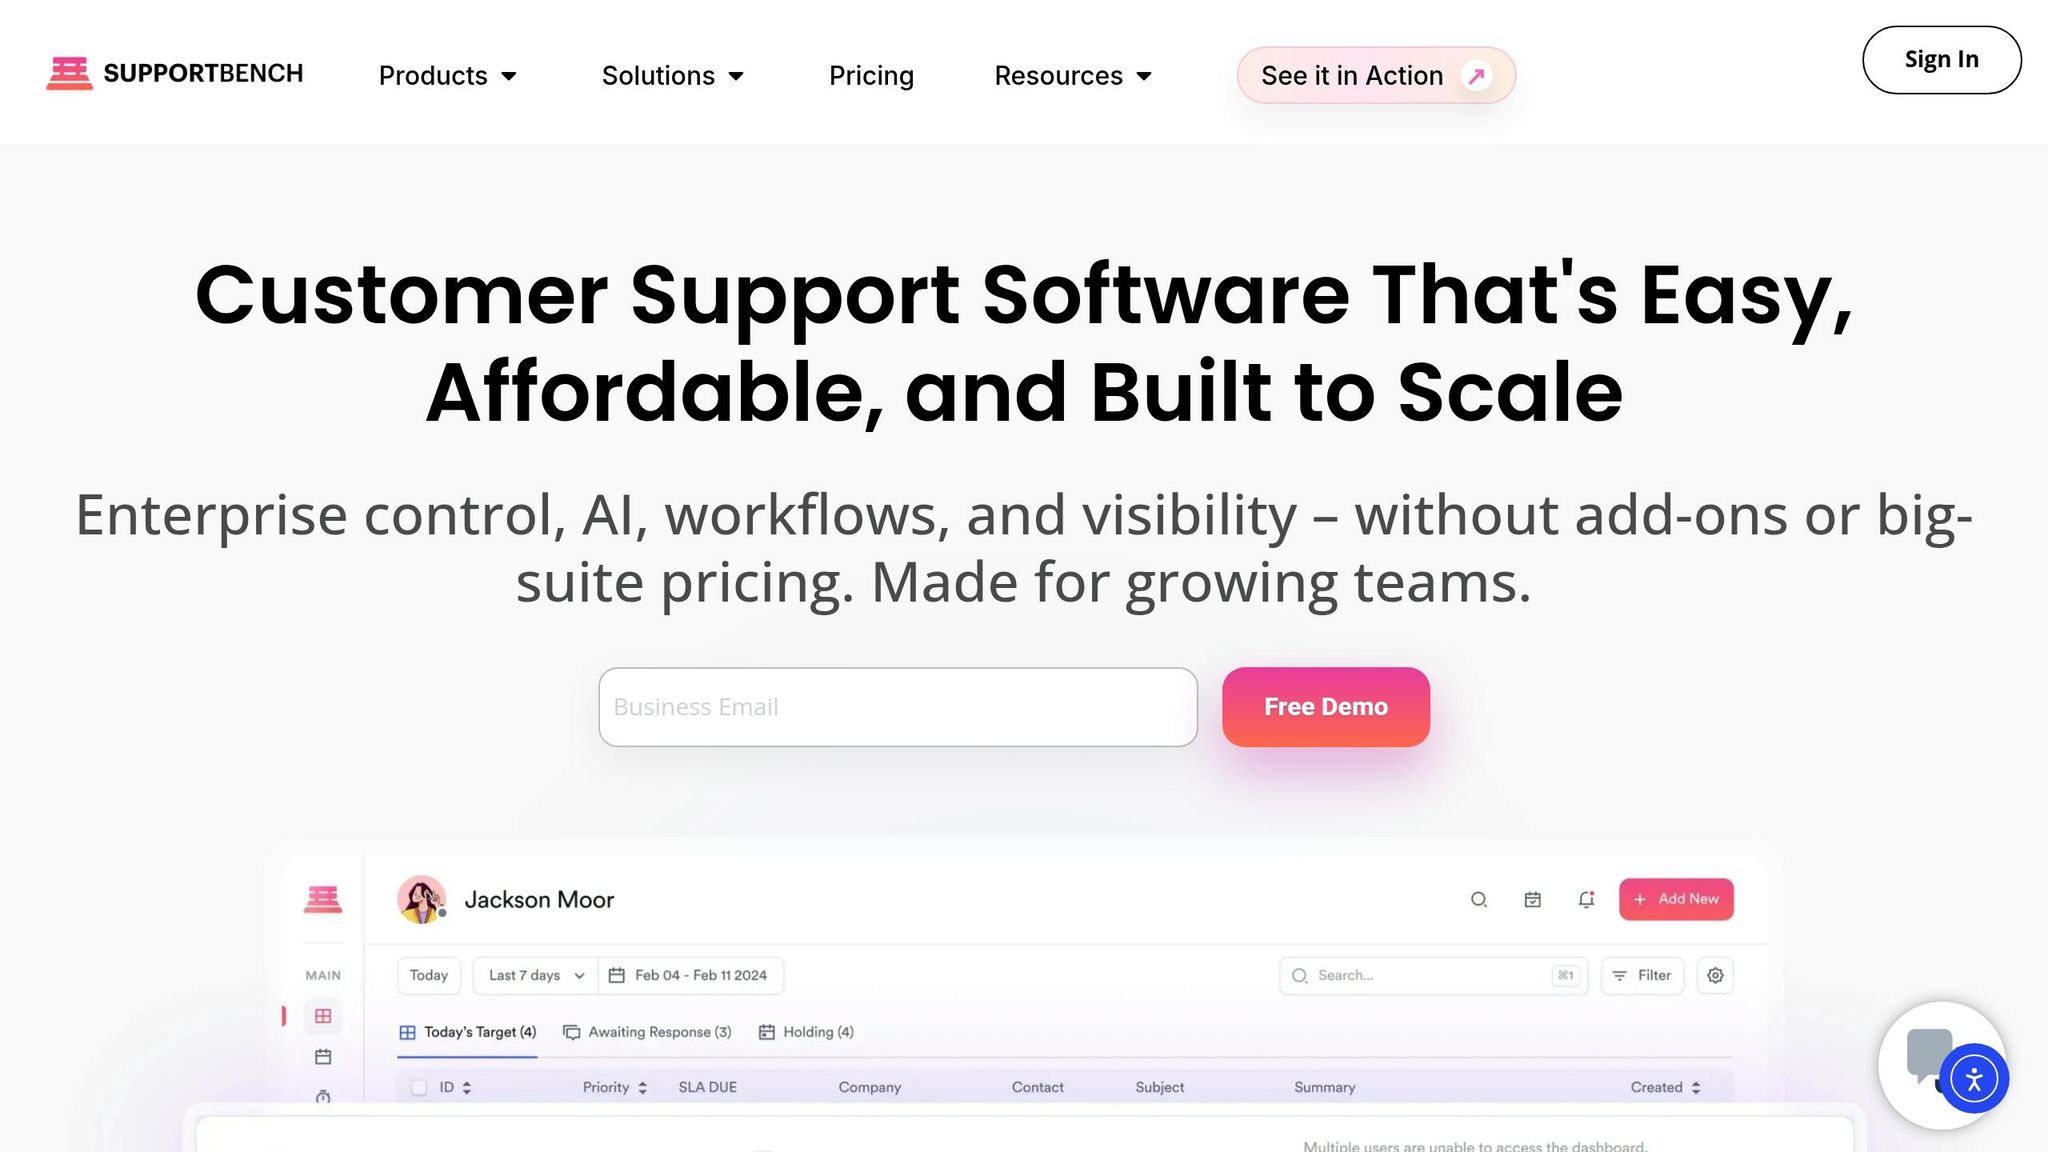
Supportbench takes AI-powered tagging to the next level by fully integrating these workflows into its platform. Unlike add-on solutions, Supportbench is designed with AI built into its core case management system. The platform uses AI to automatically assign tags, predict CSAT and FCR outcomes, and manage dynamic SLAs that adjust based on context and priority [10]. For example, if a customer renewal is approaching, the system can tighten SLA timelines to ensure a smoother experience. By applying your defined taxonomy consistently across all incoming tickets, Supportbench ensures clean, actionable data from the start. This allows agents to focus on resolving issues rather than categorizing them, streamlining operations and improving efficiency [2].
Step 4: Review and Update Your Tagging System
Keeping your tagging system effective requires regular updates. Just like when you first built your taxonomy, ongoing reviews ensure your tagging strategy stays aligned with your business as it evolves. Products change, customer needs shift, and agents may develop inconsistent tagging habits. Without consistent maintenance, your taxonomy can spiral out of control, potentially growing to over 400 tags in just six months. What should simplify operations can quickly become a source of confusion [2]. The key is to treat your tagging system like any other important operational asset – regularly audit, measure, and update it.
Run Regular Tag Audits
Schedule periodic tag audits – either quarterly or twice a year – to keep your system clean and prevent unnecessary growth [2]. During each audit, review a sample of 50–100 tickets per week and have supervisors re-tag them without seeing the original tags. This "blind re-tagging" approach can uncover misclassification patterns that training alone might not resolve [11]. Look for inconsistencies in how similar concepts are tagged and consolidate overlapping tags. Pay attention to catch-all categories like "Other" or "General Inquiry." If these tags are frequently used, it could mean your primary categories need better definition [2]. A good rule of thumb? Apply the 2% rule – any tag used less than 2% of the time should be considered for removal or consolidation [11].
Measure Tag Performance
Once you’ve audited your tags, evaluate their performance using key metrics. These metrics help determine how well your tagging system is working:
- Tag consistency rate: Measures how consistently different agents apply the same tags to similar issues. Aim for 85% or higher [11].
- Tag coverage rate: Tracks the percentage of tickets that are tagged. Low coverage might mean agents are skipping tagging or the taxonomy is too complex [11].
- Average tags per ticket: Indicates whether you’re striking the right balance – too few tags mean you’re missing details, while too many can overwhelm agents. Industry benchmarks vary: SaaS companies often see 2.1–2.8 tags per ticket with 75–85% consistency, while fintech companies tend to aim for 2.5–3.2 tags per ticket with 80–90% consistency [11].
Dashboards can be invaluable for tracking these metrics by agent, team, or time period. For example, if one agent uses a specific tag far more than others, it might signal a need for retraining rather than a problem with your taxonomy [11]. Use these insights to guide updates to your tag list.
Update Your Tag List as Needs Change
Using the findings from your audits and performance metrics, refine your tagging system to match your business’s evolving needs. Maintain a tag glossary with clear, single definitions for each tag, and update it alongside your taxonomy to avoid redundancy or overlap [2]. If "Other" is a popular tag, it’s a sign that your primary categories may need to expand [2]. As your ticket volume grows from hundreds to thousands per month, consider moving from a flat taxonomy (a simple list of tags) to a hierarchical one (with categories and subcategories). This structure offers better flexibility for reporting [1].
"The taxonomy is the strategy. Ticket tagging is just the execution."
– Jake Bartlett, Writer and Customer Support Expert [2]
Regularly reviewing and updating your system ensures that your tagging strategy remains an essential tool for efficient, scalable support operations.
| Company Stage | Tag Consistency Rate | Avg Tags per Ticket | Tag Coverage Rate |
|---|---|---|---|
| Early-stage (<50 employees) | 60–75% | 1.5–2.2 | 75–85% |
| Growth (50–500 employees) | 75–85% | 2.0–2.8 | 85–92% |
| Mature (500+ employees) | 80–90% | 2.5–3.5 | 90–95% |
Common Tagging Mistakes and How to Fix Them
Once you’ve set up a solid, AI-powered tagging system, it’s important to watch out for common mistakes that can derail its effectiveness. These issues often start small but can snowball, turning valuable insights into a jumble of noise. To maintain clear and actionable data, you need to actively avoid these pitfalls.
Inconsistent Tag Names
Inconsistent tag names can scatter your data. For example, if agents use "Billing", "Payments", and "Invoicing" to describe the same concept, your reports will split a single trend into multiple, disconnected categories [2]. The solution? Stick to one approved term for each concept. Add one-sentence definitions to an onboarding glossary to ensure everyone stays aligned. During audits, identify and merge redundant tags without hesitation [2].
Tagging Too Many Low-Priority Cases
Even with a well-designed taxonomy, over-tagging can bog you down. If agents are tagging routine issues like password resets or quick acknowledgments, you’re wasting effort on data that won’t drive meaningful decisions. Focus on the 80% of cases that have the highest impact [2]. To streamline, use a two-tier system: require a high-level "Topic" for every ticket and reserve "Subtopics" for cases that truly need extra detail. Automate tagging and routing for simple, low-complexity issues to save time [1][2].
"You don’t need to tag everything. You need to tag the information that drives decisions (routing, reporting, escalations, and trend analysis)."
– Swifteq [2]
Skipping Regular Updates
Your tagging system isn’t something you can set up and forget. Over time, it can become cluttered with redundant or outdated tags, making it harder to extract useful insights [2]. To prevent this, review and refine your tags regularly. Get rid of vague, catch-all categories like "Other." If agents frequently struggle to find the right tag, it’s a sign that your primary categories need tweaking – not that you need to create a dumping ground [2]. Keep your tag glossary updated as part of this process, ensuring every tag has a clear and specific definition.
Conclusion: Build a Tagging Strategy That Scales
A well-thought-out tagging strategy ties directly to your business objectives, ensuring that every tag contributes to meaningful decisions. If a tag doesn’t influence how you resolve a ticket or interpret your support data, it’s just adding unnecessary clutter instead of driving clarity [2].
To keep things streamlined, stick to one term per concept and avoid broad, catch-all categories. Write a concise, one-sentence definition for each tag to strike the right balance between usability and analytical precision [2][1]. This structured approach creates a solid foundation for automating customer support workflows.
AI tagging can dramatically lighten the load for agents by delivering accurate and consistent tagging across thousands of tickets, even as customer interactions evolve. It eliminates the subjective guesswork and synonym confusion that often plague manual tagging workflows [3].
Make it a habit to review your tagging system every six months. Consolidate duplicates, remove tags that no longer serve a purpose, and update your glossary. This ensures your taxonomy stays clean and adapts to your business needs rather than becoming a tangled mess [2].
FAQs
What’s the minimum set of tags I should start with?
Start by organizing your tags into broad, high-level categories that address the main areas of customer support, such as billing, technical issues, account management, and general inquiries. Within each category, add specific tags for frequently encountered issues. For example, under billing, you might include tags like “Fee Waiver” or “Overcharge”. For general inquiries, tags like “Long Wait Times” or “Policy Questions” could work well.
This approach keeps your tagging system straightforward and easy to manage while allowing room for future growth. At the same time, it ensures you’re capturing the most useful insights from customer interactions.
How do I keep agents tagging consistently without slowing them down?
To help agents tag quickly and consistently, it’s important to design a tagging system that’s both straightforward and effective. Start with a clear, well-organized taxonomy – something detailed enough to support reporting needs but simple enough for agents to use without confusion.
Make sure to provide precise tag definitions so there’s no ambiguity about their use. Regular training sessions and constructive feedback can also go a long way in maintaining tagging accuracy.
To lighten the workload, consider introducing AI-driven workflows to automate tagging where possible. Finally, schedule periodic reviews to ensure the system stays consistent and to spot any gaps that might need attention.
How do I roll out AI auto-tagging safely without breaking reporting?
To introduce AI auto-tagging without interfering with reporting, begin with a limited test on a carefully chosen subset of tickets or categories. Conduct manual reviews to verify its accuracy, and compare the AI-generated tags with the existing ones to identify any discrepancies. Use this feedback to fine-tune the AI for better performance. During the rollout, keep both manual and AI-generated tags running side by side to maintain consistency. Regularly monitor the system’s performance to ensure it delivers precise tagging and dependable insights.