Migrating from Jira Service Management (JSM) to a modern, AI-powered customer portal can significantly improve your support operations. While JSM works for basic ticketing, it often struggles to meet the complexities of B2B customer needs, such as managing multiple requests, offering flexible branding, and providing advanced self-service options. Here’s how you can make the switch effectively:
- Identify JSM Limitations: JSM restricts request types, fields, and branding options, making it less ideal for robust B2B support.
- Plan Migration: Catalog your current portals, forms, workflows, and data. Use tools like Jira Cloud Migration Assistant to export and clean up data.
- Leverage AI: Add AI-powered tools for smarter search, automated ticket routing and prioritization, and dynamic forms that adapt based on user input.
- Use a Phased Approach: Migrate in stages – start with low-risk projects, test thoroughly, and minimize downtime with real-time sync tools.
- Enhance User Experience: Build advanced features like conditional logic in forms, role-based access, and AI-driven self-service widgets.
Switching to a modern portal delivers faster resolutions, better branding, and a more user-friendly experience for both customers and support teams. By following a structured migration plan and incorporating AI tools, you can address JSM’s limitations while improving efficiency and customer satisfaction.
Step 1: Review Your Current JSM Setup
Start by examining each project’s "Customer channels" and selecting "Visit the portal" to evaluate the customer experience. This step helps establish a baseline for aligning Jira Service Management (JSM) features with the new portal capabilities. Documenting your current setup ensures a clear roadmap for a smooth migration process.
Catalog Portals, Forms, and Data
Go to "Project settings" > "Portal settings" to list branding details like the portal name, welcome message, logo, and announcements. Next, navigate to "Project settings" > "Request types" to record all request types and their groupings. Additionally, review "Project settings" > "Workflows" to identify transitions marked with the "Show transition on the customer portal" checkbox. Don’t forget to document any ProForma forms used on the portal – note which forms collect initial request data and which are for follow-up purposes.
Export Essential JSM Assets for Migration
Use the Jira Cloud Migration Assistant to export forms, workflows, and permissions. This tool is invaluable for preparing your data for migration and auditing your current setup. Make sure to catalog agents, customers, organizations, and ticket fields, including custom fields like string, boolean, date, and number types.
Take time to clean up your data. Remove duplicates, empty fields, and broken records. Also, check whether your portal allows open sign-ups or restricts access to specific customers added by admins. This setting will influence how you manage user access during the migration process.
Leverage AI to Refine Your Setup
Once your data is secure, identify areas where AI can improve the portal experience. Start by checking "Project settings" > "Portal settings" to see if the search bar is enabled. If it’s disabled due to the absence of a linked knowledge base, consider adding AI-powered search and self-service features to your new portal.
Improve request type descriptions by using AI to simplify technical jargon (e.g., rephrasing "VPN Access" to "System Access"). Review workflows to identify manual transitions that could benefit from AI-driven predictive resolutions. Lastly, enhance ProForma forms by applying AI-driven dynamic fields, which can improve the accuracy of submitted data.
sbb-itb-e60d259
Step 2: Build Your Migration Plan
JSM vs Modern AI Portal: Key Feature Comparison
Breaking your migration into smaller stages makes the process much easier to manage. This phased approach allows you to test and troubleshoot without causing major disruptions. Instead of risking everything with a "Big Bang" migration, you can move systems gradually – by project or department – while keeping your operations running smoothly during the transition to helpdesk software. For smaller organizations with up to 5,000 users, plan for about four months. Larger teams with more than 10,000 users should expect the process to take six months or longer.
Use a Phased Approach to Reduce Downtime
Start by migrating portal-only users first, leaving project data for later. This step reduces the workload on launch day since the migration assistant won’t need to reprocess those accounts. Next, pick a pilot project – preferably a low-risk one – to uncover potential issues and fine-tune your field mappings before moving critical data. Synchronization tools like Exalate or Backbone can help keep both JSM and your new portal updated in real time, allowing teams to transition at their own pace. During migration phases, freeze editing on source JSM projects to avoid data loss and use system banners to direct users to the new portal.
Match JSM Forms to New Portal Features
Take time to review each JSM request type and align it with the capabilities of your new portal. For example, you might rename "VPN Access" to "System Access" for better clarity. If you have more than seven request types, group them into categories to make navigation easier. Simplify long, static forms by incorporating conditional logic, which hides irrelevant fields and reduces cognitive overload. You can also use AI-driven auto-tagging to automatically categorize incoming requests and apply regex pattern matching to validate data like email addresses or phone numbers as they’re entered. These updates not only streamline processes but also highlight the advantages of the new portal compared to JSM’s limitations.
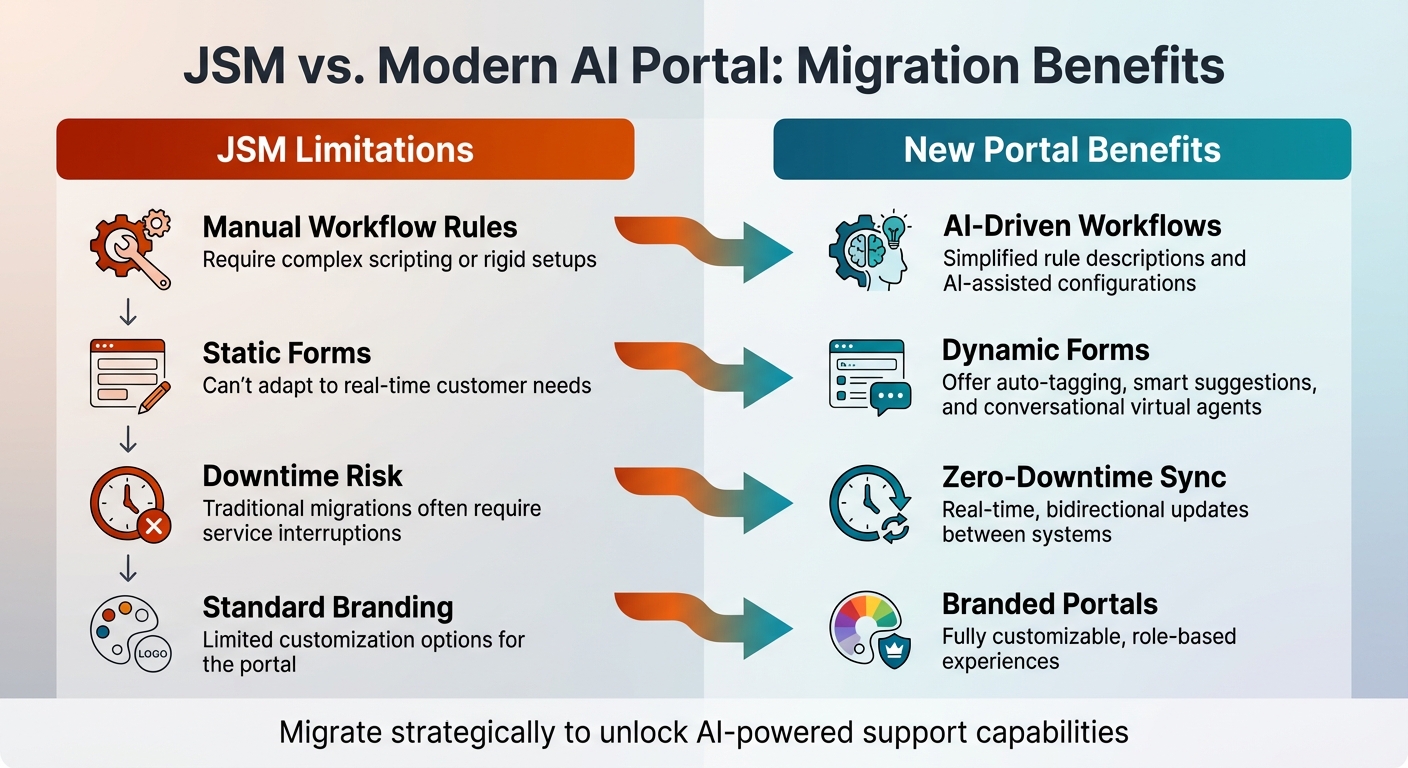
Compare JSM Limits vs. New Portal Benefits
By identifying the limitations of your current setup, you can prioritize which features to adopt in your new portal. For example, JSM’s static forms and manual workflow rules often require complicated scripting, whereas modern portals use AI to create dynamic fields that adjust to real-time customer needs. Additionally, JSM’s preset themes and basic branding options can’t compete with the fully customizable, role-based experiences offered by AI-driven portals.
| JSM Limitation | New Portal Benefit |
|---|---|
| Manual Workflow Rules: Require complex scripting or rigid setups. | AI-Driven Workflows: Simplified rule descriptions and AI-assisted configurations. |
| Static Forms: Can’t adapt to real-time customer needs. | Dynamic Forms: Offer auto-tagging, smart suggestions, and conversational virtual agents. |
| Downtime Risk: Traditional migrations often require service interruptions. | Zero-Downtime Sync: Real-time, bidirectional updates between systems. |
| Standard Branding: Limited customization options for the portal. | Branded Portals: Fully customizable, role-based experiences. |
Once the initial transfer is complete, use Delta Migration to capture only new tickets and updates. Before migration, clean up duplicate workflows and remove inactive users to simplify the process and improve system performance.
Step 3: Run the Migration Process
Now that your migration plan is set, it’s time to put it into action. This stage focuses on transferring your data, rebuilding forms in the new portal, and running tests to ensure everything works as expected. The objective? Seamlessly move customer records and portal configurations without a hitch.
Export and Prepare JSM Data
Automated migration tools are your best friend here – they can handle exporting tickets, contacts, organizations, agents, and knowledge base articles without disrupting operations. To ensure everything stays intact, map your source fields (like ticket status, priority, and custom fields) to the target system’s structure. Make sure your export includes:
- Customer data: ID, Name, Email, and Company
- Organization details: Domains and Descriptions
- Ticket information: Comments, attachments, CCs, and custom statuses
- Help center content: Categories, sections, articles (including translations), and inline images
For JSM Premium or Enterprise users, don’t forget to include Assets (like objects, schemas, and attributes) and Virtual Service Agent data (intents and flows).
Here’s a real-world example: In June 2024, Anthony Kendrew, a Microsoft 365 Developer at The Salvation Army, used an automated tool to migrate 36,000 tickets and 400 knowledge base articles from Freshservice to Jira Service Management. The process took just 30 hours and cost $2,000. Before diving into a full-scale migration, run a test migration with a small dataset – around 20 tickets and articles – to confirm your field mappings and data accuracy. Pre-configure target agents in your system to ensure tickets are assigned correctly.
With your data ready, it’s time to shift gears and focus on rebuilding forms for the new portal.
Rebuild and Import Forms into the New Portal
You can start fresh by creating forms from scratch or use pre-designed templates available in your service project settings. To keep things running smoothly, map each form field to a corresponding backend field so that customer submissions automatically update the relevant records. If certain information is already stored elsewhere or can be inferred, skip it to keep your forms simple.
For fields requiring specific formats – like account numbers or IP addresses – use Regular Expressions (Regex) to enforce proper formatting. Enhance the user experience by adding inline validation, such as word limits or value ranges, to catch errors before submission. Configure forms to allow edits, letting customers fix typos or invalid entries without needing agent help. Always use the Preview function to test conditional logic and validation rules before going live.
Test Mappings and Data Accuracy
Once your forms are imported, it’s time to test everything thoroughly. Start by verifying that all field types are compatible between systems and that your data mappings are spot-on. Run sample tickets through the new system to confirm that statuses, automation rules, and escalations work as they should.
Use a small demo set of about 20 tickets to check for accuracy before committing to the full migration. For more complex tickets or those with large attachments, run a "Custom Demo" by selecting specific items to ensure unique configurations transfer correctly. Automated tools can help you compare source and target data, ensuring no records are missed and identifying any discrepancies. During the transition, delta migration can capture new or updated records created while the full migration is underway, preventing data loss.
Thorough testing at this stage sets the foundation for a successful portal launch in the next phase.
Step 4: Add AI Features to Your New Portal
Once you’ve completed the migration and verified the data’s accuracy, it’s time to supercharge your portal with advanced AI tools. These features can significantly enhance resolution efficiency and boost customer satisfaction. To make the transition smoother, introduce these tools gradually.
Enable AI for Customers and Agents
Start by activating AI Answers in your portal settings. This tool uses generative AI to scan your knowledge base and provide instant responses to common customer questions – no manual setup required. For more structured troubleshooting, such as password resets or VPN issues, configure Intent Flows with pre-built templates. The system relies on confidence scores to decide whether to offer an AI-generated response or escalate the issue to a human agent, complete with all the necessary context.
You can also enable Predictive CSAT to identify potential dissatisfaction before customers even submit feedback. This allows your team to step in proactively. Additionally, AI can analyze resolved tickets to draft new knowledge base articles, which your team can quickly refine. For agents, enable AI summaries to condense lengthy comment threads into quick overviews, and activate similar request detection to pull up proven solutions from past cases using Natural Language Processing. These features transform rigid systems like JSM into dynamic, context-aware support platforms.
Set Up Dynamic SLAs and Customer Context Tools
Dynamic SLA management adapt response times based on real-time factors like upcoming renewals or customer health scores. This ensures that critical accounts receive prompt attention when it matters most. Integrate your portal with systems like HRIS, MDM, and IAM to pull essential user details – such as roles, departments, and purchase history – into each ticket. This consolidated view eliminates the need for agents to dig through multiple systems for basic information.
Leverage AI-driven triage to automatically categorize requests, assign priorities, and route tickets to the appropriate team or specialist. The system can even tailor intake forms by showing or hiding fields based on the requester’s role, making submissions quicker and more intuitive. Before launching, use simulation mode to test your AI on historical tickets. This helps identify gaps in your knowledge base and fine-tune responses.
Combine these features with tools that empower customers to solve issues on their own.
Add Self-Service Tools like Website Widgets
Deploy AI-powered self-service widgets across your website – not just on your main portal. These widgets let customers browse your knowledge base or submit tickets without interrupting their workflow. Using Natural Language Processing, the widgets interpret user intent, even in unclear queries, and suggest relevant articles as the customer types. They also support streaming responses, displaying AI-generated answers in real time, which gives users the impression of faster service.
Set up vague query detection to prompt users for clarification when their input is too broad. This ensures the AI delivers precise, actionable solutions instead of generic responses. With support for over 20 languages, these tools make your portal accessible to users worldwide while maintaining consistent answer quality across all channels, whether through the web, Slack, or Microsoft Teams.
Step 5: Test, Launch, and Track the New Portal
Run Parallel Testing Before Launch
Before going live, keep your old JSM portal and the new system running simultaneously for at least two weeks. Use the "Visit the portal" feature to preview the customer experience firsthand. Involve testers from multiple departments to check forms, search functionality, and mobile compatibility. Ensure that inline validation rules – like character limits or IP address formats – work as intended, and test all "if-then" scenarios in dynamic forms to verify that hidden fields appear when required. Double-check role-based permissions and ensure that single sign-on or magic links operate smoothly across all user scenarios. Once you’re confident the system is stable, you can focus on launching the new portal.
Switch Over and Tell Your Users
After thorough testing, it’s time to introduce your users to the new portal. Update every customer-facing channel to direct users to the new system. Use clear, multi-channel communication to explain the changes, emphasizing benefits like faster AI-powered responses and improved search functionality. Position the new portal as "the fastest path" to solutions, rather than framing it as a forced change. Keep the old JSM database accessible for a while to cross-check data if needed. To ease the transition, provide training materials such as video tutorials or step-by-step guides.
Your customers should not be blindsided by the changes to their experience. Share the expected new features and capabilities of your new client portal before it goes live, and give them a timeline.
- Nada Chaker, Growth Marketer at Stacker
Track and Improve After Launch
Once the portal is live, continuous monitoring will help it adapt to meet customer needs. Pay close attention to key metrics like first-contact resolution (FCR) and containment rate to gauge how well users can resolve issues without agent assistance. AI-predicted CSAT scores can help you spot dissatisfaction early, and tracking vague query patterns will highlight areas where forms or your knowledge base might need adjustments. Measure ticket deflection to see how effectively your knowledge base reduces support requests, and monitor AI intent confidence scores to ensure the system accurately understands user needs. For portals using advanced AI, keep an eye on hallucination rates to maintain the accuracy of automated responses. These metrics will guide you in refining content, improving workflows, and expanding self-service options in the weeks after launch.
Common Mistakes to Avoid During Migration
Steering clear of these common errors can make the transition from JSM to an AI-powered platform much smoother.
Clean Up Duplicate and Inactive Customers
One of the biggest hurdles during migration is dealing with duplicate records. Since JSM relies on a single customer account per email address, any overlap in email addresses between systems can cause issues. The migration assistant will automatically link data to existing accounts instead of creating new ones, which can lead to unexpected results. Additionally, if organizations with the same name exist in both systems but house different users, errors may occur. To avoid this, either rename or merge these organizations before starting. For example, update the source organization’s name to something like "Acme Inc. – Legacy" to distinguish it. If you’re consolidating instances, you can use the "Continue to merge" option, but remember to review permissions afterward since merged users inherit the destination organization’s access levels.
Inactive and deleted users also require attention. JSM labels these as "Former customers" during migration, preserving their ticket history but preventing login access. However, migrating every inactive account can clutter your new system with unnecessary data. To avoid this, use the migration scope to select "Only customers related to selected projects" instead of "All customers". This way, only the most relevant records will transfer. Before migrating, validate your data to ensure you’re only bringing over what’s essential.
Plan for Downtime and User Changes
Once your data is prepared, it’s time to focus on planning for downtime and managing user transitions. JSM doesn’t automatically send email invites to customers during migration, so you’ll need to notify them manually and share the new help center link. To streamline the process, consider migrating customer accounts ahead of time. This reduces the workload on migration day.
For larger datasets, a delta migration can be a game-changer. This method allows your team to keep working in the source system while the main migration runs in the background. Once the primary transfer is complete, a delta sync captures any new or updated records created during the transition.
"If you migrate your customers before your project data, you will save time on migration day. This is because the migration assistant will not need to re-migrate those customers."
- Atlassian Support
Don’t Overpay for Add-Ons
Many organizations face an unpleasant surprise when migrating from JSM Premium or Enterprise to a Free or Standard plan. While the data may transfer successfully, it often becomes inaccessible unless you upgrade the destination license. Features like Assets, Virtual Service Agents, and multiple help centers are only available on higher-tier plans, so you’ll need to budget for these features again. Additionally, items like help center banners and logos don’t migrate automatically and must be re-uploaded manually.
Another hidden cost comes from technical debt. Migrating custom scripts and outdated records can add unnecessary complexity. As Josh Brostoff, a ServiceNow Architect, explains, "Migrating from ITSM to CSM is an opportunity to reduce technical debt, eliminate unnecessary customizations, and build a more sustainable architecture". Instead of transferring everything, consider archiving old incidents as text in work notes or applying data archive rules to simplify your production environment. By focusing on essential data and using the built-in features of a modern platform, you can cut down on both migration expenses and long-term operational costs.
Conclusion: Get a Better Customer Portal Experience
Switching from JSM to an AI-powered portal can completely reshape your B2B customer support journey. By following the five-step migration process discussed earlier, you can sidestep issues like duplicate records and downtime while gaining access to features that go beyond what JSM offers. This careful planning not only avoids common migration headaches but also opens the door to improved support capabilities.
Take real-world examples like Creditsafe, achieving a 90% incident resolution rate within eight hours, or Maurice Blackburn Lawyers, with a 91.27% first-touch resolution rate. These cases highlight how migrating simplifies data management while cutting down on overhead and operational hurdles. AI-powered tools, such as virtual agents, intent-based search, and dynamic SLAs, can boost resolution rates by 50% and improve CSAT scores by up to 40%. Incorporating AI-driven dynamic forms and personalization, as outlined in the migration steps, ensures your portal reflects your brand seamlessly.
"When your support portal looks like part of your product, it establishes a cohesive customer experience that builds confidence in your brand."
- Simon Wright from Refined
FAQs
What should we migrate first to avoid downtime?
To keep downtime to a minimum, begin by moving dependencies and mappings. This step ensures all connected components are properly addressed, lowering the chance of unplanned disruptions. Pay attention to pre-migration tasks, such as pinpointing interdependencies and double-checking configurations, to help keep operations running smoothly.
How do we handle duplicates and inactive users during migration?
When migrating data from Jira Service Management (JSM), handling duplicates and inactive users is crucial for a smooth transition. Start by identifying and consolidating duplicate customer organizations to avoid errors during the import process. For inactive users, review their account statuses and types to ensure only active accounts make the cut. If there are mismatched account types, adjust roles accordingly to maintain the correct access levels. Taking the time to validate these details helps minimize potential disruptions caused by duplicates or inactive accounts.
How can we validate field mappings before the full cutover?
To ensure your field mappings are correct before the full cutover, run a demo migration. This step gives you the chance to preview how the data will look, spot any potential issues, and make necessary adjustments. It’s a crucial way to confirm data accuracy and maintain all relationships during the transition.
Related Blog Posts
- How do you migrate from a US helpdesk to a non-US platform without losing history or data?
- How do you map HappyFox categories, custom fields, and statuses to a new system?
- How do you migrate away from Jira Service Management without losing ticket history?
- JSM alternatives for customer-facing B2B support: what to use instead