Migrating to a new helpdesk system without cleaning your data can lead to chaos – duplicates, errors, and outdated records will disrupt workflows and create unnecessary headaches. Proper data preparation ensures a smooth transition, reduces costs, and prevents "silent data loss." Here’s what you need to do:
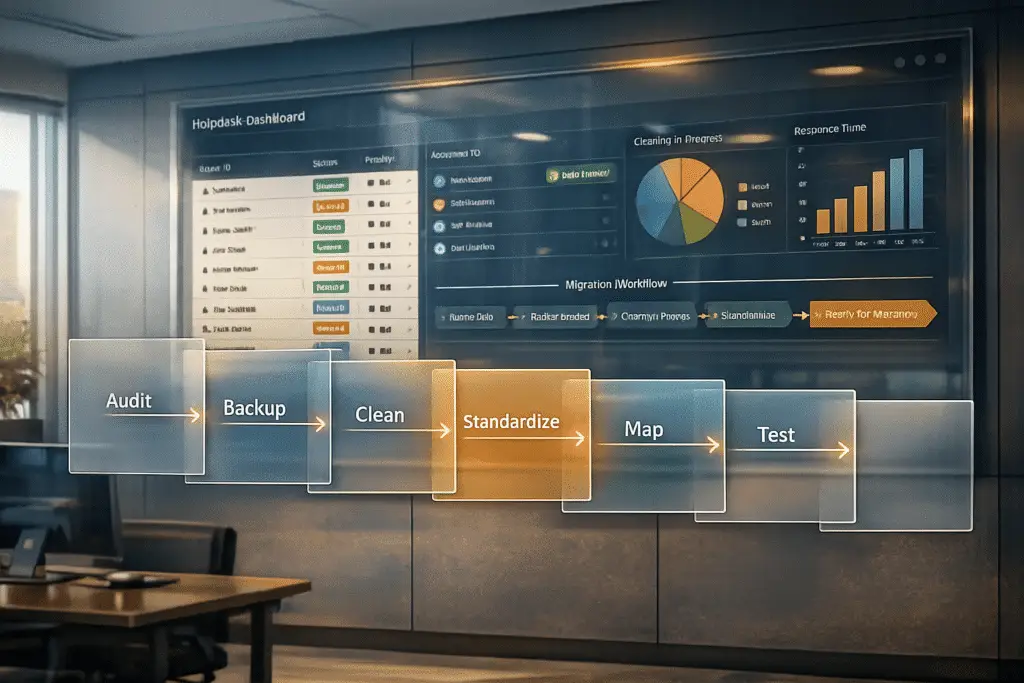
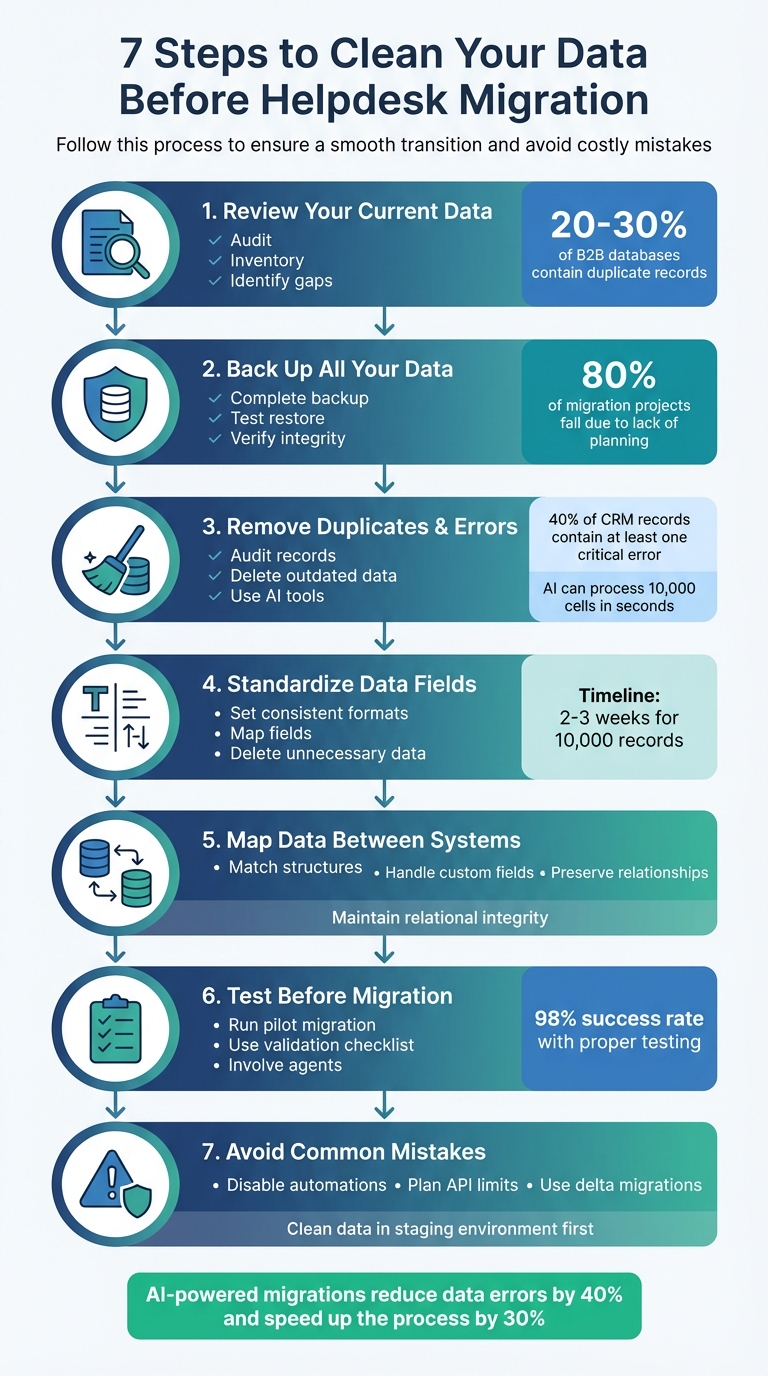
- Audit and Inventory: Review your current data, catalog key datasets (tickets, customer profiles, etc.), and identify gaps or duplicates.
- Backup Everything: Create a full, tested backup of all records, including attachments and metadata, to avoid losing critical data.
- Clean Your Data: Remove duplicates, fix errors, and standardize formats to ensure accuracy and usability in the new system.
- Standardize Fields: Align legacy data with the new system’s structure to avoid issues like mismatched formats or lost records.
- Map Data Accurately: Ensure every field in the old system maps correctly to the new one, preserving relationships and avoiding broken links.
- Test Thoroughly: Run a pilot migration with a small dataset to catch errors before migrating everything.
- Avoid Mistakes: Disable automations, plan for API limits, and use delta migrations for updates during the process.
7-Step Data Cleaning Process for Helpdesk Migration
Data Migration Roadmap | Your Step By Step Instructions For Faultless Data Migration
sbb-itb-e60d259
Step 1: Review Your Current Data
Start by conducting a full audit of your existing data. This step is essential for a smooth migration, as it helps you identify what needs to be cleaned and standardized. The process begins with Discovery – a thorough examination of your legacy system to understand its data structure, volume, and quality [1]. Think of it as creating an inventory before a big move.
Build a Complete Data Inventory
Begin by cataloging all the data types in your current system. Key datasets to include are tickets (and their attachments), customer profiles and users, organizations, knowledge base articles, and agent performance records [4]. Additionally, evaluate how your team interacts with the system, noting any manual tags, custom fields, or workarounds that might not align with the standard data schema [1].
In early 2026, the US-based SaaS company Assignr tackled their migration by assessing their data landscape in detail. Over a decade, they had accumulated redundant and outdated data. By cleaning up this data ahead of time, they managed a seamless migration over a single weekend using the Help Desk Migration tool [4].
Set clear goals for your inventory process using the SMART Framework: Specific, Measurable, Achievable, Relevant, and Time-bound. For instance, you might aim to "Catalog all tickets and user data by March 15, 2026, with 100% accuracy" [4]. Document every field in the source system and map it to its corresponding location in the target system. This ensures nothing is overlooked during migration [1].
Once your inventory is complete, move on to identifying inconsistencies and duplicates.
Find Data Gaps and Duplicates
After cataloging your data, profile it to uncover null values, duplicate records, and inconsistent formats (such as mismatched date or currency formats). Flag irrelevant records, like notifications or spam, for exclusion. Studies show that most B2B databases contain 20–30% duplicate records and over 25% incomplete fields [6].
Ensure relational integrity by checking that links between records – such as tickets tied to specific users or knowledge base articles – are intact. Look for tickets assigned to deleted or inactive users, as these could become unassigned or "lost" during migration. Run a small-scale test migration with about 20 tickets to identify potential issues like formatting errors, character encoding problems, or missing attachments before proceeding with the full transfer [5].
Wealthsimple, a Canadian online investment platform, successfully migrated their data by prioritizing the preservation of their extensive knowledge base and key metadata. By using flexible mapping during the inventory stage, they ensured a high-quality transfer and met their tight migration deadline without disrupting operations [4].
Step 2: Back Up All Your Data
Now that your inventory is done, it’s time to safeguard everything before diving into the cleanup phase. Start by creating a complete backup of your helpdesk system. Why? Because skipping this step could spell disaster. In fact, 80% of migration projects fail, and a lack of proper planning and preparation is the top reason [9].
"Backup everything. I cannot stress this enough. …A complete, tested backup is your one and only safety net." – ClonePartner [8]
What to Back Up
Your backup should cover everything – not just the obvious stuff. Here’s what to include:
- Tickets, along with attachments and inline images
- Customer records
- Agent data, even for inactive or legacy agents
- Knowledge base articles
- Metadata such as timestamps and user IDs [8][2]
A common pitfall during migrations is forgetting attachments or inline images. Overlooking these can leave your data incomplete and create major headaches [8].
To avoid data mismatches, consider temporarily freezing system updates during the backup and migration process. Once the migration is complete, keep your old system in read-only mode for a short period. This acts as a safety cushion for your team [1][2].
After backing up all critical data, take a moment to verify its integrity before moving forward.
Verify Backup Quality and Accessibility
Don’t just assume your backup works – test it. Perform a test restore in an isolated environment to ensure everything is there. Compare key data counts – like tickets, contacts, and attachments – between the source system and the backup [8][2].
Manually check a sample of complex tickets with attachments to confirm that formatting and links are intact [8]. Store your backups in secure, off-site, or cloud-based environments to protect against local failures [1][8]. On top of that, develop and test rollback scripts so you can reverse the migration if something goes wrong [1][7].
With a solid backup in place, you’ll be ready to move forward with confidence. Keep your original backups until the new system has been thoroughly validated and proven stable post-migration.
Step 3: Find and Remove Duplicates, Errors, and Junk Data
With backups safely in place, it’s time to take on the messy side of data – errors, duplicates, and outdated records. This step is crucial because ignoring hidden data issues can derail even the best-planned migrations. Did you know that 40% of CRM records contain at least one critical error? Fixing these mistakes can save organizations an average of 12% of their annual revenue, which often gets wasted on chasing down corrections [12]. Cleaning your data at this stage not only saves money but also improves the user experience.
"Every piece of bad data you migrate becomes someone else’s problem to discover." – William Flaiz, Digital Transformation Executive [3]
Another reason this step matters? Migration costs often depend on the total number of records being moved. By auditing and removing unnecessary data, you can lower your migration costs [5]. Plus, clean data ensures a smoother user experience, which is critical for adoption, especially during the first 90 days.
Identify Common Data Problems
Start by auditing your records – contacts, accounts, tickets, and more. Establish a baseline count and measure the fill rate of required fields. Incomplete records should be completed, merged, or deleted as needed [3][5].
Next, look at the age of your records. Those that haven’t been updated in over 12 months are likely candidates for deletion [3]. For deduplication, use email addresses as your primary key since most helpdesk systems treat them as unique identifiers [2]. Also, watch for variations like "Jon Smith" vs. "John Smith" or nicknames like "Robert" and "Bob" [3].
Instead of cleaning data directly in your production system, export it to a staging environment. This approach keeps your current operations unaffected and provides a clear audit trail to track changes [3][12]. For a database of around 10,000 records, expect to spend 2–3 weeks on the cleaning process. Larger databases or those with severe duplicate issues might take 4–6 weeks [3].
Use AI to Clean Data Faster
While manual methods are effective for setting a baseline, AI tools can dramatically speed up the process. Manual cleaning can be slow and prone to errors, especially with near-duplicates. AI tools, on the other hand, can process 10,000 cells in seconds using techniques like fuzzy matching and probabilistic record linkage [10]. These tools can also standardize phone numbers to E.164 format (e.g., +13125550199), convert dates to ISO 8601, and normalize country codes to ISO 3166-1 [10][12].
AI-powered anomaly detection helps flag unusual data points, like a $180,000 entry in a field where $40,000 is the norm, for human review [10]. Many AI tools also use natural language processing, allowing you to describe tasks in plain English – think commands like "Fix phone number formats and flag missing states" [11]. Additionally, AI can predict and fill missing data by analyzing patterns within your dataset [3].
"Dirty data doesn’t just annoy admins – it blocks forecasting accuracy, eats up SDR call time, and erodes the credibility of every dashboard your C‑suite eyeballs." – Fawwad Mirza, Founder, Pixcell [12]
Before importing your cleaned data into the new system, make sure to disable all automations, including triggers, SLAs, and notifications [5][2]. Achieving a 95% data accuracy rate can increase user adoption by 30% within six months [12]. Conversely, launching with less than 80% accuracy often leads to user churn within the first 90 days [12].
Step 4: Standardize Data Fields
After tackling errors and duplicates, it’s time to standardize your data to fit the structure of your new helpdesk system. Inconsistent formats – like mixing "MM/DD/YYYY" with "DD/MM/YYYY" or using different status labels such as "Solved" versus "Closed" – can cause reporting issues, disrupt SLA tracking, and result in orphaned records. This process ensures that your old system’s data aligns seamlessly with the new one.
Set Consistent Data Formats
Start by creating a mapping document to rename, reformat, and transform each legacy field into the format required by your new system [1]. For example, if your current system uses statuses like "Open", "Pending", and "Solved", you might map them to the new system’s equivalents, such as "New", "Waiting", and "Closed."
Standardizing timestamps is another critical step. If your old system stores dates as "03/12/2026" but the new system expects "2026-03-12" (ISO 8601 format), define those transformation rules upfront. Similarly, ensure user IDs are consistent so tickets remain correctly linked to the right agents and customers [1].
Legacy tags also need attention. Merge duplicate tags, fix typos, and formalize any necessary tags to avoid confusion. If your operations involve billing or multi-currency support, standardize currency codes to ISO formats or whatever format your new system requires to maintain accurate financial reporting [1].
Before importing data, follow best practices for implementing a new helpdesk to pre-configure your target system. This means setting up custom fields, agent profiles, and groups in the new system’s interface. Without these fields in place, you risk silent data loss during migration [2]. Once your schema is fully prepared, lock it down to prevent accidental changes during the import process [2].
"Custom fields created too late cause silent data loss. Always build schema first." – ClonePartner [2]
With your data formats standardized and the new system ready, the next step is to clear out outdated records to streamline the migration process.
Delete Outdated or Unnecessary Data
After standardizing fields, focus on removing data that no longer holds operational value. Eliminate duplicates, incomplete records, and other irrelevant entries. To avoid clutter, migrate only the last two to five years of ticket history [2].
"There’s no benefit to moving junk. A clean dataset saves time, reduces risk, and improves results in the new system." – Eric Klimuk, Founder and CTO of Supportbench [1]
For tickets linked to agents who are no longer with the company, reassign those records to a placeholder user. This keeps the data intact without cluttering your active user list [2]. Before proceeding, conduct a brief pilot to confirm the accuracy of your transformations [2][7].
Once your data is standardized and cleaned, you’re ready to move on to mapping fields between the old and new systems.
Step 5: Map Data Fields Between Systems
After cleaning and standardizing your data, the next step is to map data fields accurately between the source and target systems. This step ensures that every piece of information lands in the right place, preserving relationships and avoiding data mishaps like broken links between tickets and customers or silent data loss where information vanishes without any warning.
Match Source and Target Data Structures
Create a comprehensive mapping guide to outline how each data field in the source system corresponds to the target system. This includes everything from ticket statuses and agent assignments to tags, custom fields, and historical data. For example, "Organizations" in your current system might align with "Companies" in the new system, while "Users" could map to "Contacts."
Maintaining relational integrity is critical. Ensure that links between tickets, agents, and customers stay intact. A good practice is to record the original system’s ID in a read-only custom field in the new system (e.g., zd_ticket_id). This technique, often referred to as idempotency with external IDs, helps avoid duplicate entries during retries and makes post-migration audits much easier.
Before starting the migration, make sure all necessary fields are pre-created in the new system. Once your schema is finalized, lock it to prevent accidental changes during the migration process. Also, disable automations to avoid triggering unnecessary alerts or notifications.
| Source Field (Example) | Target Field (Example) | Mapping Best Practice |
|---|---|---|
| Organization ID | unique_external_id | Use for idempotency and audit trails |
| Tags [] | Tags or Multiselect | Map one-to-one; use multiselect fields if needed |
| Public Comment | Public Reply | Retain the author’s identity and ensure clean formatting |
| Private Comment | Private Note | Keep internal notes confidential |
| CSAT Rating | Satisfaction Rating | Include the original timestamp in a note if needed |
Once your core mappings are set, shift your focus to handling unique or complex cases that may require extra customization.
Handle Custom Fields and Special Cases
Custom fields and special cases demand careful attention. A good sequence for migration is to start with Companies/Organizations, followed by Contacts/Users, then the ticket schema, and finally tickets with their conversation history. This order ensures that relationships between records are preserved and avoids orphaned data.
For custom fields, match option lists between systems to prevent unnecessary transformations. If a ticket is assigned to an agent who no longer exists, reassign it to a placeholder user or staging group instead of leaving it unassigned. For features without a direct equivalent – like specific side conversations – convert the content into private notes, including transcripts and original timestamps where applicable.
When migrating historical tickets, it’s important to preserve the original creation and resolution timestamps. Many systems automatically stamp the "created_at" time during import, which could skew your reporting. To maintain accuracy, store these original timestamps in custom, read-only fields. Before moving forward with the full migration, run a test using a "golden sample" – a small, diverse set of tickets that includes challenging cases like long threads, large attachments, custom statuses, and unusual field values. This pilot phase helps identify potential mapping issues before they affect the entire dataset.
"A Freshdesk migration done well feels boring. That is the goal." – ClonePartner
Once your mappings are complete, validate the data through controlled testing before proceeding with the full migration. This step ensures everything is aligned and ready for a smooth transition.
Step 6: Test Data Before Migration
After cleaning and mapping your data, the next step is testing. This is essential to ensure your data remains intact and functional before the full migration. Running a pilot migration helps uncover mapping errors, broken links, and formatting problems that could disrupt your system. Organizations that prioritize data integrity in this way have seen a 98% success rate in helpdesk system migrations [13].
Run Test Migrations
Begin with a pilot migration using a small but representative sample of data – like tickets, comments, attachments, and knowledge base articles. Before starting, disable all notifications, triggers, and observer rules to avoid accidental alerts. Forgetting this step might result in automated emails being sent to customers or agents, potentially causing confusion or damaging trust.
Make sure the account handling the migration has full administrative permissions on both systems. You might also want to request a temporary API limit increase from your helpdesk vendor to avoid throttling during the process.
Once the test migration is complete, review the migration reports. These reports will highlight which records transferred successfully, which failed, and any that were skipped, along with specific error codes or reasons. Common issues to watch for include:
- Unassigned tickets caused by missing agent profiles
- Broken links between tickets and customer data
- Mismatched or incomplete custom fields
Involve your frontline support agents in the testing process. Ask them to interact with the migrated data – creating, assigning, and closing tickets – to confirm workflows function correctly and the data remains usable. After reviewing the migration reports, use a validation checklist to ensure every detail has transferred properly.
"Validation is your safety net – it confirms that everything moved as expected and continues to function correctly in the new system."
― Eric Klimuk, Founder and CTO, Supportbench
Use Validation Checklists
A validation checklist acts as your final safeguard for verifying data integrity. Apply this checklist to your pilot migration to catch any issues before proceeding with the full dataset. It should cover both technical checks (e.g., API credentials and field mapping) and functional checks (e.g., agents’ ability to create and close tickets).
| Validation Category | Checklist Item |
|---|---|
| Data Mapping | Ensure all fields map correctly and retain their original formatting. |
| Relational Data | Confirm ticket-to-customer and ticket-to-agent links are intact. |
| Metadata | Verify creation and update timestamps are accurate. |
| Attachments | Check that inline images and file attachments are accessible in the new system. |
| Agent Profiles | Match agent roles and permissions between the old and new platforms. |
| Knowledge Base | Look for broken internal links and confirm correct category placement. |
| Workflows | Test macros, ticket statuses, and automation rules for proper functionality. |
| Security | Ensure sensitive data is visible only to authorized personnel. |
Pay close attention to relational data – the connections between tickets, users, and organizations. Losing these links diminishes the context and value of your data, especially for reporting. Metadata like timestamps, user IDs, and character encodings also deserve careful auditing, particularly if your system handles multilingual content. These details are crucial for maintaining accurate reporting and meeting compliance standards.
Step 7: Avoid Common Migration Mistakes
After you’ve cleaned, standardized, and mapped your data, the last thing you want is for small oversights to derail your migration. Even a well-organized migration can stumble if critical details are ignored. A major misstep? Thinking you can "fix it later." Once you’re in the new system, your team will already be busy with training and troubleshooting, leaving little room to address leftover data quality issues [3].
Know the Migration Risks
Several common pitfalls can throw your migration off track. One major issue is poor understanding of source data, which can result in duplicates, incomplete information, or outdated records being carried over [14]. Another frequent problem is forgetting to disable triggers and notifications. If left on, these can accidentally send spam alerts during the import process, especially when migrating historical tickets [5].
Teams also often underestimate API limits, which can slow down the migration and lead to unexpected delays [5]. And don’t assume that standard exports are flawless – they frequently include test data, outdated bounced contacts, or duplicate entries from earlier system integrations [3].
Take Novohit‘s experience in February 2025 as a cautionary tale. Operations manager David Bertolini oversaw a migration to Zoho using the vendor’s in-house team instead of specialized services. The process stretched over six weeks, including two weeks where the company operated without a helpdesk platform and relied solely on email. Post-migration, they faced missing data and character set errors, forcing them to manually sift through thousands of records [14].
Recognizing these risks upfront allows you to take proactive steps to avoid them.
How to Prevent These Issues
To minimize problems, start by cleaning your data in a staging environment. Deduplicate records, standardize formats (like using E.164 for phone numbers), and verify everything before the final import [3]. Be sure to turn off automations, as repeated failures during the process can escalate issues [5].
Plan your cutover during a low-activity period, such as when ticket volume is minimal, to reduce service disruptions [7]. For any changes made in the old system during the migration, use delta migrations – a follow-up process to transfer newly created or updated tickets [5]. Additionally, request API limit increases from your helpdesk vendor to speed up data transfers and avoid throttling issues [5].
"If you aren’t planning, you are planning to fail." – Tetiana Belevska, Help Desk Migration Service [14]
Below is a quick comparison of common pitfalls and how to prevent them.
Migration Pitfalls Comparison Table
| Pitfall | Prevention Strategy |
|---|---|
| Failing to notify the company | Announce the migration company-wide so all teams are ready for the transition. |
| Lack of expertise | Hire experienced professionals or use automated migration tools instead of manual methods. |
| Late evaluation of results | Test and validate data immediately after the migration to catch and fix issues quickly. |
| Message overlap | Monitor both systems post-migration to identify duplicate tickets or missed communications. |
| Broken relational data | Ensure proper mapping of linked records (like tickets to users) in your documentation. |
Conclusion: Set Yourself Up for Migration Success
Preparing your data before migration lays the groundwork for everything that follows. It helps reduce costs, avoids potential disruptions, and ensures your tracking processes are accurate from the very beginning [3][5].
The numbers speak for themselves. AI-powered migrations can reduce data errors by up to 40% and speed up the process by about 30% [16]. For example, in November 2025, Pfizer successfully unified its data silos using AI-driven tools. The results? A 57% reduction in total ownership costs, 19,000 annual hours saved, and report generation time slashed from one hour to just 40 seconds [15].
"The migration itself isn’t the hard part. Cleaning your data before you move it is." – William Flaiz, Digital Transformation Executive, CleanSmartLabs [3]
AI tools take what used to be weeks of manual effort and turn it into automated, dependable workflows. The secret is to view data cleaning as a key strategy rather than an afterthought.
FAQs
How do I know which data to migrate vs. delete?
To determine which data to keep or remove, assess its relevance, accuracy, and practicality. Prioritize cleaning and organizing your data to prevent potential issues. Eliminate stale, duplicate, or outdated records to simplify your system, and only migrate data that is up-to-date and essential for your operations. This approach ensures a smoother migration process and enhances the overall quality of your data.
What’s the fastest way to deduplicate tickets and contacts?
The quickest way to handle duplicate tickets and contacts is by combining AI-powered detection with automation rules. AI scans for duplicates using customer data and ticket content, while automation takes care of merging them seamlessly. For trickier scenarios, manual review adds an extra layer of precision. This method helps cut down on mistakes, saves time, and ensures cleaner data – whether you’re migrating a helpdesk or managing daily support tasks.
How can I prevent silent data loss during the migration?
To prevent silent data loss during a helpdesk migration, take these steps:
- Audit your data: Before migrating, clean up your database by removing duplicates, outdated records, and any inaccuracies. This helps ensure you’re only transferring useful, accurate information.
- Map and test data: Match fields between the old and new systems carefully. Run tests with small data samples to catch potential issues early.
- Validate post-migration: After the migration, double-check that all records, timestamps, and relationships have been transferred correctly.
These steps help maintain data accuracy and reduce the risks associated with migration.
Related Blog Posts
- How do you migrate from Salesforce Service Cloud to a helpdesk without losing case history?
- How do you migrate away from Freshdesk without losing tickets, contacts, or history?
- How do you map Freshdesk fields, groups, and statuses to a new helpdesk?
- How do you map Kayako statuses, priorities, and custom fields to a new helpdesk?